



How to Choose the Right Plastic Injection Molding Material for Your Product

Best purchase I’ve made this winter! The color and knitting are exquisite and it’s so comfy! Went from NYC to Miami without ever taking it off. Super cute!!
Choosing the right material for your product can determine its success or failure. Poor material selection contributes to roughly half of all plastic product failures, according to David Wright's Failure of Plastics and Rubber Products. This reality affects everything from an injection molded plastic automotive housing to a simple consumer enclosure, especially when you rely on Plastic Injection Molding to bring your design to life. You need a systematic approach, not guesswork.
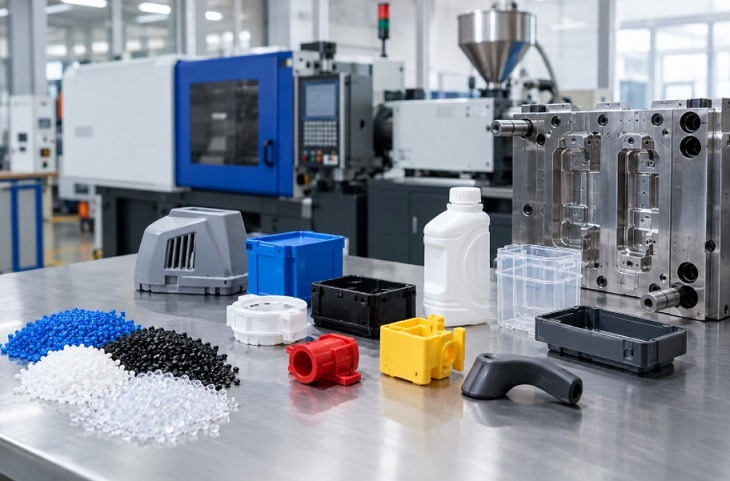
Start by defining functional requirements, environmental exposure, and regulatory demands. Then explore material families—from commodity resins to engineering plastic component options—while considering how each candidate behaves during the Plastic Injection Molding process. Finally, validate your choice through prototyping and expert consultation.
This framework addresses key factors for material selection: performance, quality, design, process, and production costs. You are matching a material to your specific application, not hunting for a universal plastic. By aligning your material choice with the capabilities and constraints of Plastic Injection Molding, this decision-making path prevents costly redesigns and delays.
Key Takeaways
-
Define your product's performance needs first. This step prevents costly mistakes.
-
Understand the three plastic families: commodity, engineering, and high-performance. Each offers different benefits.
-
Match material properties to your application. Consider strength, heat resistance, and chemical exposure.
-
Factor in manufacturability and cost. Material choice affects cycle time, tooling, and total part cost.
-
Follow a systematic selection process. Build a spec sheet, shortlist candidates, and prototype with the actual material.
Define Your Product's Performance Needs
Define the performance your part must deliver before selecting a material. This step prevents wrong choices later. Your needs fall into mechanical and thermal demands plus chemical, environmental, and regulatory factors.
Evaluate Mechanical and Thermal Requirements
Start with the mechanical demands of your application. Consider the load your part carries and the impact forces it may experience. Tensile strength and flexural strength tell you how the material behaves under stress. For impact-prone parts, impact resistance matters.
Polycarbonate offers 2-3x higher toughness than ABS, with Izod values reaching 640-850 J/m compared to ABS's 200-320 J/m.
Temperature exposure matters too. Heat deflection temperature (HDT) tells you when a plastic softens under load. For standard unfilled PEEK, HDT is 160°C. For a reinforced grade, HDT reaches 550°F (288°C) at 264 psi. This performance range suits demanding applications like an injection molded plastic automotive housing under the hood.
Verify the material's strength against your application needs. Match mechanical strength requirements and thermal properties to your operating conditions. Check the mechanical properties and thermal properties on the datasheet. Material properties define your part's behavior. Understanding material properties prevents errors.
Consider Chemical, Environmental, and Regulatory Factors
Chemical resistance matters when your part contacts oils, solvents, or cleaning agents. Verify chemical resistance compatibility before finalizing your material choice.
Environmental factors affect your selection. UV radiation degrades many plastics. Consider this comparison:
|
Plastic type |
Outdoor lifespan |
Typical outcome |
|---|---|---|
|
UV-stabilized polypropylene |
Up to 5 years |
Maintains strength better than standard polypropylene |
|
Non-stabilized polypropylene |
Significant degradation within 12 months |
Can lose up to 70% of tensile strength and flexibility |
For outdoor enclosures, specify UV resistance. Moisture resistance matters in humid environments. Temperature resistance matters for hot applications. Resistance to wear may also matter. Resistance to moisture, UV, and chemicals protects your part.
Regulations add complexity. For food-contact applications, follow FDA rules:
-
Check 21 CFR parts 174–179 to see if the component is listed as an approved indirect additive.
-
If not found, consult 21 CFR 182–186 and the inventory of GRAS notices for GRAS status.
Standards like UL for flammability resistance and RoHS may also apply.
Aesthetics also matter. Your design may require a specific color, transparency, or surface finish. An engineering plastic component for a consumer product often needs consistent appearance.
Assess these functional requirements early. This specification guides your material search and keeps the plastic injection molding process running smoothly. You understand the plastic injection molding process better when you know your material properties.
Understand Plastic Material Families
Compare Commodity vs. Engineering vs. High-Performance Plastics
You can sort plastics into three tiers based on performance and cost. Commodity resins include polyethylene (PE), polypropylene (PP), and polystyrene (PS). These offer low cost and adequate properties for basic parts. You can use them for disposable containers and low-stress components. Engineering-grade resins—ABS, polycarbonate (PC), and polyamide (PA)—deliver better strength and heat resistance. They handle moderate loads and higher temperatures. High-performance plastics like PEEK and PTFE serve extreme conditions.
Each group costs less per pound than the next tier up, but capability decreases proportionally. Temperature capability illustrates this gap clearly:
PTFE operates continuously at 260°C, while polypropylene reaches only 100°C (130°C with 30% glass fiber).
This 160°C difference determines which applications each material can serve. A commodity resin works for low-load housings. An engineering plastic component suits automotive interior parts. High-performance plastics handle aerospace or medical devices. Each tier fills a specific role.
Most plastic injection molding uses thermoplastics. They melt when heated and solidify when cooled. This allows scrap reprocessing and reduces waste. Thermosets undergo an irreversible reaction during molding. You cannot remelt them. For efficiency, thermoplastics dominate the process.
Match Material Properties to Your Application
The properties of each material family differ. Review mechanical strength, tensile strength, and impact strength. Compare thermal properties, heat resistance, and resistance to chemicals. Evaluate properties like heat deflection temperature and stiffness. Check UV resistance for outdoor enclosures. Confirm sterilization compatibility for medical devices. Resistance to wear matters for moving parts. Check impact resistance and moisture resistance. Always review datasheets for accurate values. Pay attention to how temperature fluctuations affect behavior over time. These mechanical properties guide your choice. The full set of properties determines part performance.
Create a shortlist of two candidates from different families. Compare the strength of each grade. For example, ABS provides excellent surface finish for consumer goods. PEEK suits harsh chemical environments where lower-grade options would fail. An engineering-grade resin like ABS offers toughness and affordable price. A high-performance plastic like PEEK provides exceptional chemical resistance and thermal stability at higher price. Your choice depends on which requirements matter most.
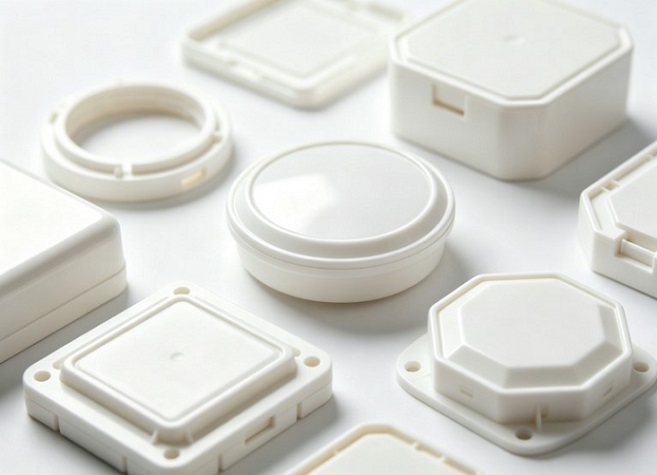
Use comparison charts to see where options overlap. Charts show the balance of strength and resistance in each family. Evaluate each candidate against your requirements. These trade-offs guide your selection. Requirements dictate the right grade. Cost helps you choose the specific resin. The process works best when you match requirements to available properties. A structured approach ensures you select the right grade the first time.
Evaluate Manufacturability and Cost in Injection Molding
Factor in Injection Molding Process Constraints
The injection molding process demands materials that flow well under pressure. Melt Flow Index (MFI) measures this flow capability. For thin-wall parts, you need a higher MFI. Materials with MFI values between 10 and 30 g/10 min fill complex molds efficiently. Some thin-wall consumer electronics require MFI ranges of 20–50 g/10 min. High-viscosity materials with low MFI flow slowly through runners and gates. This slow flow extends injection time and increases cycle time proportionally. Understanding this relationship helps you choose the right plastic injection molding approach for your part.
For injection molding, a higher Melt Flow Index (MFI) in the range of 10 to 30 is preferred. This higher MFI enables faster flow and better filling of complex molds, which directly contributes to shorter injection times and reduced overall cycle times for thin-wall parts.
Switch to a higher-flow grade when filling challenges arise. This reduces cycle time but may sacrifice mechanical properties. High-flow grades also have limited availability. Consider an injection molded plastic automotive housing under the hood. It needs both flow for complex geometry and heat resistance for engine temperatures. You must balance these demands during the injection molding process.
Shrinkage also varies by material. Polypropylene typically shrinks 1.5–2.5%. Polycarbonate shrinks less. Your mold design must account for these differences. Wall thickness, draft angles, and gate placement all interact with material behavior. Plastic part design optimization requires understanding these interactions early. Understanding shrinkage helps you optimize the injection molding process for dimensional accuracy.
Calculate Total Part Cost and Tooling Impact
Raw material price represents only one cost component. The table below shows how material cost share changes with volume:
|
Production Volume |
Material Cost as % of Total |
|---|---|
|
Small (100-1,000 units) |
5-15% |
|
Mid (5,000-10,000 units) |
15-25% |
|
High (100,000+ units) |
30-40% |
Raw material typically accounts for 20-50% of your per-part cost in injection molding, with the spread between commodity and engineering resins being enormous.
Tooling wear increases with abrasive fillers like glass fiber. Processing temperature affects energy consumption. Scrap rates impact yield. Part geometry influences material selection through draft angles and wall thickness requirements. Design for manufacturing means considering these factors before committing to a resin. Every decision in the injection molding process affects your bottom line.
The right injection molding process balances performance against total cost. Your design choices affect every downstream expense. Prototyping with the actual production material validates manufacturability before mass production begins. This step prevents costly surprises and ensures your process runs smoothly.
Execute a Systematic Material Selection Process
You now have a clear picture of your performance needs, material families, and cost drivers. The next step transforms that knowledge into a confident decision. Follow this five-step approach to execute a systematic material selection process.
Build a Specification Sheet and Shortlist Candidates
Start by creating a detailed specification sheet. Document every functional requirement: mechanical loads, operating temperatures, chemical exposure, regulatory standards, and aesthetic expectations. Include dimensional tolerances and expected production volume. This document becomes your reference point for every subsequent decision.
Your specification sheet prevents over-engineering, a common and expensive mistake. Consider how over-specification drives up costs:
|
Cost Driver |
Impact of Over-engineering |
|---|---|
|
Wall Thickness |
+10–30% material cost, +20–50% cycle time |
|
Material Selection |
+15–60% material cost, +10–25% tooling wear |
|
Tool Complexity |
+20–100% tooling cost, +10–30% lead time |
|
Secondary Operations |
+15–40% total part cost |
|
Tolerance Requirements |
+10–50% production cost, +5–20% scrap risk |
Optimizing overengineered parts can reduce costs by 20–40%. One manufacturer achieved a 32% reduction in per-part cost after optimizing wall thickness, downgrading material, and eliminating secondary operations. Your specification sheet forces you to separate genuine requirements from assumed ones.
From this sheet, shortlist two to three candidate materials. Choose options from different families—perhaps an engineering plastic component candidate alongside a commodity resin. Compare their datasheets against your specifications. Evaluate tensile strength, impact resistance, heat deflection temperature, and chemical compatibility. This shortlist keeps your options open while narrowing the field.
Prototype, Test, and Consult with Experts Like Yistar

Consult with material suppliers and molders before committing to tooling. Early collaboration with experts like Yistar provides design for manufacturing feedback that catches problems before they become expensive. A molder's early involvement in design consulting is a deliberate strategy to identify and eliminate defect causes before production begins. Mold flow simulation predicts resin behavior, preventing trial-and-error that leads to defects like short shots or flow lines. Uniform wall thickness and proper rib design prevent warping and sink marks. Gate placement and draft angles control resin flow and ensure clean ejection.
Prototype with your actual production material. This step validates manufacturability and performance before mass production. The financial decision between prototype and production tooling depends on total program cost:
|
Cost Dimension |
Prototype Tooling |
Production Tooling |
|---|---|---|
|
Typical tooling cost range |
$1,500 – $15,000 |
$15,000 – $150,000+ |
|
Cost per part |
High (due to low volume) |
Low (when amortized over high volume) |
|
Cost recovery model |
Fixed cost over small batches |
Fixed cost over large runs |
A prototype tool costing $4,000 with a 2,000-part life results in a $2 per part tooling burden. A $60,000 production tool amortized over 500,000 units adds only $0.12 per part. For order quantities under a few thousand units, prototype tooling is often the cheaper option. The transition to production tooling is only justified when projected volume offsets the higher initial investment.
Test your prototypes using industry-standard methods. Tensile testing per ISO 527-2 measures mechanical strength. Flexural testing per ISO 178 uses three-point bending. Impact testing through Izod or Charpy methods provides toughness data. Thermal behavior requires HDT testing per ASTM D648. These tests confirm your material meets specifications.
Finalize your choice and document the reasoning. Record test results, cost analysis, and design for manufacturing decisions. This documentation guides future iterations and helps your team understand why you selected that specific material.
Partnering with a full-service provider like Yistar gives you access to expert design for manufacturability reviews, prototyping services, and custom injection molding solutions. Their team helps you navigate the injection molding process, ensuring high-quality injection molding outcomes. This collaboration prevents costly mistakes and accelerates your path to production. Contact Yistar with your project specifications for a personalized material recommendation and design review.
Material selection balances performance, cost, and manufacturability. You achieve this balance through a structured process: define requirements, explore material families, validate with prototypes. Skipping these steps leads to expensive redesigns or product failures. An injection molded plastic automotive housing demands the same rigor as any engineering plastic component.
Yistar offers expert guidance in material selection and process optimization. Their team reviews your design for manufacturability, recommends suitable materials, and supports production from prototype to volume. This collaboration protects quality and prevents costly mistakes.
Contact Yistar with your project specifications. Receive a personalized material recommendation and design for manufacturing review before you commit to tooling.
FAQ
What happens if I select the wrong material?
You risk premature failure, warping, or chemical degradation. Poor choices cause roughly half of all plastic product failures. Redesigning after tooling costs thousands of dollars. The injection molding process cannot fix a fundamental material mismatch. Start with your requirements, not guesses.
When should I choose an engineering plastic component?
Choose engineering grades when parts face moderate heat, mechanical stress, or chemical exposure. An engineering plastic component like ABS or polycarbonate handles tougher conditions than commodity resins. Review your operating environment first. This selection process demands careful thought about your specific application.
Can I switch materials after building production tooling?
Sometimes, but shrinkage differences affect mold dimensions. A switch from polypropylene to polycarbonate changes final part size. Verify flow characteristics before committing. This process requires thorough evaluation with your molder. Early consultation prevents expensive tool modifications later.
Why prototype with the actual production material?
Test grades behave differently than generic samples. Real production material reveals true shrinkage, flow, and mechanical performance. Prototyping validates manufacturability before mass production begins. This step prevents costly surprises. Your chosen resin must perform consistently at scale.
How do I balance material cost with performance needs?
Raw material represents only part of total cost. Consider tooling wear, cycle time, and scrap rates. An injection molded plastic automotive housing needs heat resistance that justifies higher resin cost. Calculate total part cost across your expected production volume before deciding.